Back in July, my 5 year old daughter finally told me she didn't want another princess party. I was secretly thrilled. I have waited for this day for the past 3 years! I brought up the idea of having a tea party and she was excited about that idea so I hit the ground running. I started collecting tea cups and saucers and planning and making lists of ideas and things we wanted to do. I knew I wanted to do some kind of craft and a photo booth to capture the fun.
The invitations were ready and they included this sweet little poem:
Come dressed in your Sunday best.
And bring your favorite doll or bear.
Smile for the photo booth.
And decorate a hat to wear.
We invited all the girls in her class as well as the girl cousins. It was a packed house with 17 little girls dressed in their cutest dresses. It was fun to meet and get to know the other Moms of Maddie's classmates. It was fun watching the girls interact as well.
I knew I wanted the girls to decorate hats because what's a fancy tea party without a fancy hat? I found several ideas on Pinterest and decided on the paper plate/paper bowl method. Each girl received a hat and decorated it with flowers, feathers, ribbon and lace. They then took turns modeling their hats in the photo booth. That was a huge hit with the girls and a few of them kept coming back for more!
We had a "formal" sit down snack including cheese, crackers, fruit, tea, juice, or apple cider. The girls really enjoyed being served. We topped off the snack with yummy cupcakes and present time. It was such a magical day. I hope all the little girls had a good time and will have this fun memory to cherish forever.
Now it is time to bombard you with pictures! Enjoy!
This was the day before trying out the photo booth and the fun props.
Enough already Mom!
Little brother Gavin having fun, too!
Photo Props are fun for Mommy's, too!
Big Brother Dylan digs the pink lips!
The Photo booth. I made the ribbon streamer and the Tea Party Sign.
The first table setting:
Large paper doilies were used as place mats:
A shabby chic bunting wrapped around branches from the yard:
An old crate as the centerpiece:
Finally got to breakout some of my milk glass collection for utensil holders:
Rusty old wire basket as a napkin holder and my ruffled linen table runner:
I hung crepe paper streamers along our sliding door and made a fabric bunting:
The goody backs filled with a tea bag and two lollipops:
The cupcakes:
The big 6:
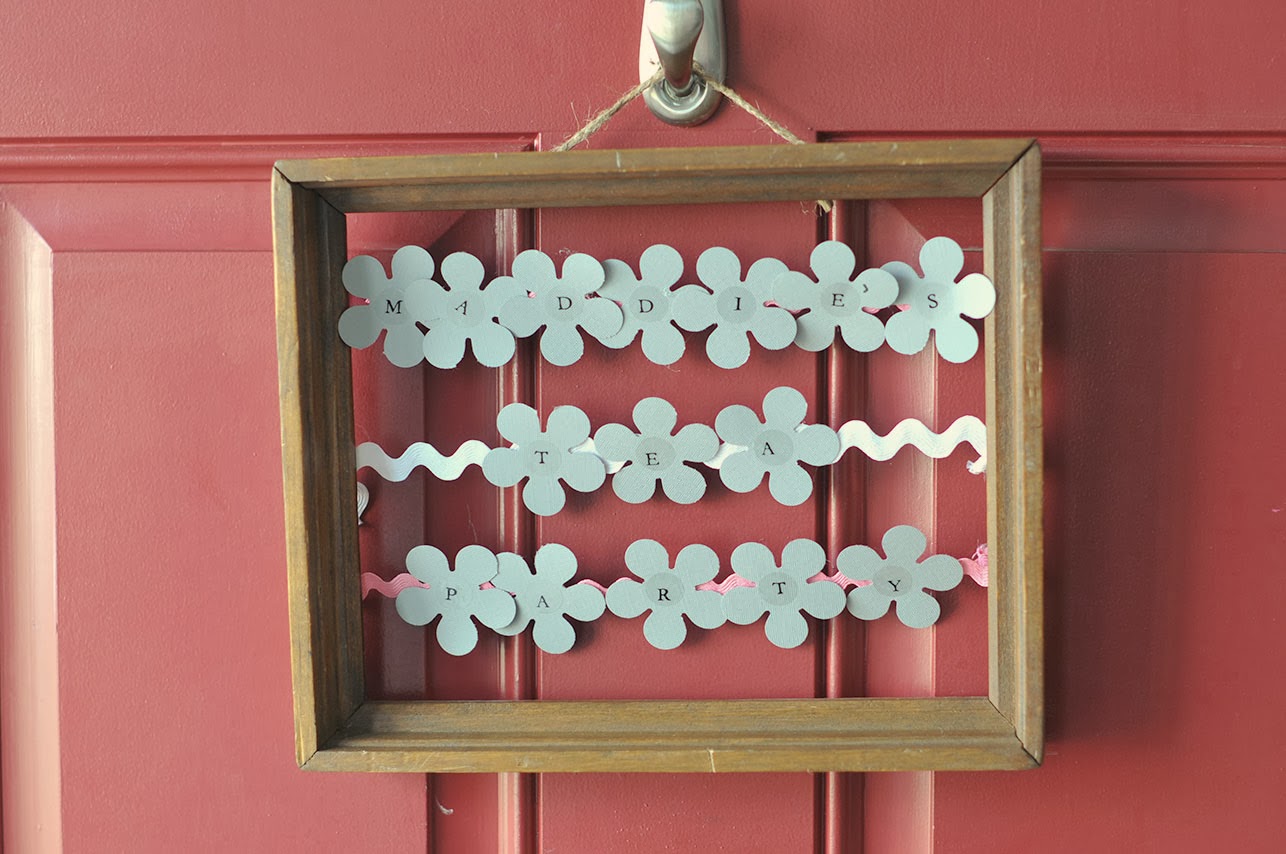
Personalized sign for the front door:
The party room:
The Photo Booth:
The hat decorating table:
The tea cups:
The anticipation of what's to come!
The photo booth props...granny glasses, tiaras, pearls, and lips:
Singing Happy Birthday:
Make a wish my sweet girl:
Opening presents:
A great surprise from her Nanna Mary and Mommy and Daddy...her very own sewing machine:
And now for the photo booth fun! I got one or more picture of each girl. They had so much fun!
The Kindergarten girls:
My little nephew was the only boy allowed. Had to let him join in the fun!
My Auntie M and three of her great nieces:
My favorite teen and tween girls:
My Mom (Nana) and my Aunt Marsha had fun, too!
All the time and love that went into this party was so worth it the hear from my daughter that it was "the best day of my life"...I love you my sweet Madalyn. I'm so happy to be your Mom and I love the little lady you are growing up to be. Happy 6th Birthday Baby Cakes!
Shara
Pin It